Author: adminwebseoguy

  • Auto Paint and Refinishing: Why Proper Preparation Matters

    Auto Paint and Refinishing: Why Proper Preparation Matters

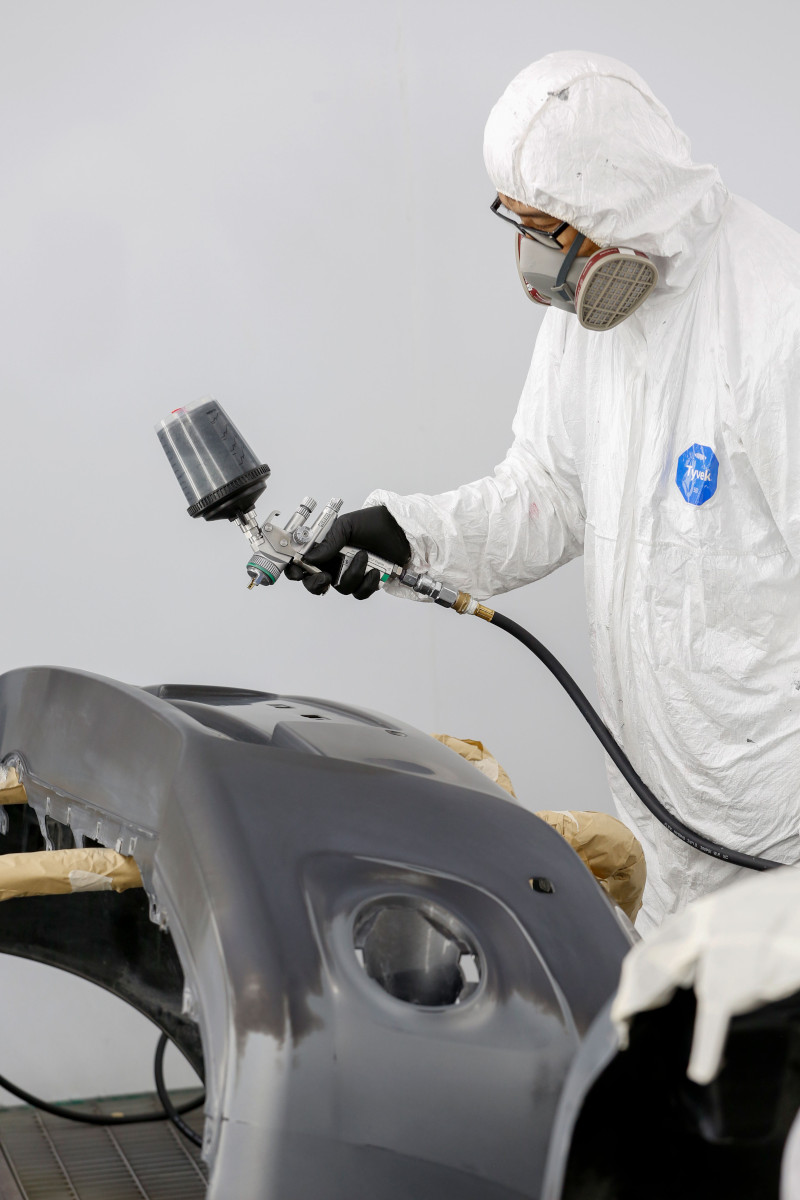
    A quality automotive paint job starts long before the paint reaches the spray gun. Proper preparation, the right materials, and attention to detail all play a part in producing a smooth, durable finish.

    Every collision repair presents different challenges. A replacement bumper may need different preparation than a previously repaired steel panel, and each surface requires the appropriate products and techniques. Skipping steps or rushing the process can lead to paint defects, poor adhesion, and costly rework.

    Understanding the steps involved in auto paint and refinishing helps explain why preparation is just as important as the final coat of paint.

    Key Takeaways

    • Inspect the repair order and replacement parts first. Knowing which panels need repair, replacement, or blending helps prevent delays and missed steps.
    • Clean surfaces before sanding. Dirt, grease, road residue, and mold release agents can interfere with paint adhesion and affect the finished result.
    • Follow the correct preparation and priming procedures. Feathered edges, properly applied primer, and careful sanding create a smooth foundation for the new finish.
    • Follow the paint manufacturer’s instructions. Recommended sanding grits, mixing ratios, application methods, and flash times vary by product.

    Start With the Repair Order and Replacement Parts

    Before beginning paint preparation, review the repair order (RO) and confirm which parts need attention. Some panels may require body repairs, others may need replacement, and adjacent panels may need blending to achieve a consistent color match.

    Understanding the full scope of the work helps you plan the preparation process and identify potential problems before the vehicle enters the paint area.

    Review the Repair Order

    The repair order outlines the work required and provides a starting point for planning the paint process.

    Check which panels are being repaired or replaced and identify any areas that require refinishing or blending. For example, a replacement door may also require blending into an adjacent fender to help match the existing finish.

    Reviewing these details early helps ensure that the necessary work is accounted for before preparation begins.

    Inspect Replacement Parts Before Painting

    Replacement parts should be checked before they enter the preparation process. Confirm that each part matches the repair order, then inspect it for damage, defects, or potential fitment issues.

    A replacement bumper cover, for instance, should be available and inspected before the vehicle reaches the paint stage. Discovering a missing or damaged part at that point can delay the entire repair.

    A few simple habits can help keep the job organized:

    • Keep the repair order accessible throughout the job.
    • Separate replacement parts from panels being repaired.
    • Check delivered parts against the repair order.
    • Address missing parts or discrepancies before moving forward.

    Proper Cleaning Is the Foundation of a Quality Paint Job

    Paint preparation begins with a clean surface. Dirt, oil, road tar, and other contaminants can interfere with sanding, paint adhesion, and the final finish.

    Clean parts before sanding, whether they are new or used, plastic or metal, and whether they are on or off the vehicle. Cleaning also makes it easier to identify existing damage and surface defects.

    The appropriate cleaning method depends on the material and the products being used.

    Cleaning Blend Panels and Replacement Parts

    Blend panels and previously painted parts can accumulate road grime, bugs, tar, and other contaminants. These should be removed before sanding or applying additional products.

    A typical preparation process may include:

    1. Wash away surface grime. Use an appropriate cleaning method to remove dirt and organic residue, then dry the panel thoroughly.
    2. Remove petroleum-based contaminants. Use a compatible solvent-based cleaner where appropriate, following the product instructions.
    3. Clean the surface again. Apply a suitable water-based cleaner to remove remaining residue and contaminants.
    4. Use clean wiping materials. Follow the cleaner manufacturer’s recommended wiping method to avoid spreading contaminants back across the surface.

    New sheet metal, used replacement parts, and sealed plastic components may require different cleaning sequences. Always confirm that the cleaners are compatible with the surface and the refinishing system.

    SurfacePreparation ConsiderationsGoal
    Previously painted blend panelRemove dirt, road tar, and other contaminants before sandingProvide a clean surface for blending
    Used replacement partClean thoroughly and inspect for existing damage or residueIdentify defects and prepare for refinishing
    New sheet metalUse compatible cleaners according to product instructionsRemove manufacturing residue and contaminants
    Sealed plasticFollow the recommended cleaning and preparation processSupport proper coating adhesion

    Preparing Raw Plastic and Repaired Filler

    Raw plastic parts can present additional challenges because manufacturing residues, including mold release agents, may interfere with coating adhesion.

    The preparation method depends on the type of plastic and the refinishing products being used. Some systems require a plastic adhesion promoter, while others specify different procedures. Follow the paint manufacturer’s technical data sheets rather than assuming the same process applies to every plastic component.

    Body filler also needs careful preparation. Remove sanding dust and use compatible cleaning products before applying primer. Avoid leaving moisture or cleaner residue on the surface, and follow the product instructions for drying and preparation.

    Proper cleaning is one of the most effective ways to reduce preventable paint defects. A surface that looks clean may still contain contaminants that affect the finished coating.

    Featheredge and Prime the Repair Correctly

    Once the surface is clean and the bodywork is complete, the next step is to prepare the transition between the repaired area and the existing finish.

    Feathering gradually tapers the edge of the old paint so it doesn’t leave a noticeable ridge beneath the new coating. The goal is to create a smooth transition that can be primed and sanded without leaving visible edges in the finished paint.

    Feathering the Paint Edge

    Use an appropriate abrasive and sanding method to taper the existing paint around the repair. The required featheredge width depends on the repair, the condition of the surrounding finish, and how many previous refinishing layers are present.

    For example, a panel that has been refinished several times may need more preparation than one with its original finish.

    The key is to create a smooth, stable transition without leaving loose paint edges or unsanded areas.

    Follow the paint manufacturer’s recommendations for sanding grits and preparation. Avoid making large jumps between abrasive grits when those jumps could leave scratches that the next step won’t adequately remove.

    Applying Primer

    Primer helps prepare the repaired area for subsequent refinishing. The appropriate product and application method depend on the substrate, repair materials, and paint system.

    When applying primer:

    • Follow the manufacturer’s instructions for mixing and application.
    • Apply the recommended number of coats and appropriate film thickness.
    • Allow the specified flash times between coats.
    • Use the recommended air pressure and spray technique.
    • Allow the primer to dry or cure as directed before sanding.

    Applying excessive material or rushing between coats can contribute to defects, including swelling around sanding scratches. Insufficient atomization or incorrect spray technique can also affect the primer’s texture and coverage.

    The objective is to create a suitable foundation for sanding and the subsequent paint layers, not simply to cover the repair as quickly as possible.

    Block Sanding: Creating a Smooth, Even Surface

    Block sanding helps level the primed repair and identify surface imperfections that may become visible after painting.

    A panel can feel smooth to the touch but still have subtle waves or uneven areas. These imperfections often become more noticeable when light reflects across the finished surface.

    Using Guidecoat and the Right Sanding Block

    After the primer has dried or cured as directed, a guidecoat can help reveal high and low spots during sanding.

    As you sand, the guidecoat gradually disappears from raised areas while remaining in low spots. This makes it easier to see where additional leveling may be necessary.

    A suitable sanding block helps distribute pressure across the surface instead of following every small contour. Longer blocks are often useful for leveling larger, flatter areas, while smaller blocks may be better suited to tighter or more curved sections.

    A cross-hatch sanding pattern can help produce a more even result. Continue checking the surface as you work, and avoid concentrating too much sanding pressure in one spot.

    Choosing the Appropriate Sanding Grit

    The correct abrasive depends on the repair stage, the primer being used, and the manufacturer’s requirements for the refinishing system.

    Coarser abrasives remove material more quickly but can leave deeper scratches. Finer abrasives produce a smoother surface but may not be suitable for correcting significant high and low spots.

    The goal is to use an abrasive that accomplishes the task without creating unnecessary surface damage.

    Repair NeedPreparation ApproachWhat to Consider
    Leveling high and low spots220 to 240 grit on a long boardChoose a grit suitable for the primer and repair
    Refining an already level surface180 gritAvoid unnecessary material removal
    Blending filler into existing paintCreate a gradual, smooth transitionAccount for the thickness and condition of previous coatings
    Preparing for the next coatingFollow the paint system’s sanding recommendationsAvoid leaving scratches that may show through the finish

    There isn’t one sanding grit or technique that works for every repair. The correct approach depends on the surface, the products being used, and the condition of the underlying bodywork.

    Common Auto Paint Preparation Mistakes

    Even experienced technicians can run into problems when preparation steps are rushed or overlooked. Several common mistakes can affect the quality and durability of the finished paint.

    Skipping the initial cleaning: Sanding a contaminated surface can spread dirt and residue or interfere with later coatings.

    Overlooking replacement part defects: Failing to inspect a part before preparation can lead to delays when damage or fitment problems are discovered later.

    Using the wrong sanding grit: An abrasive that’s too coarse can leave scratches that become visible after painting, while an abrasive that’s too fine may not provide the preparation required for the next coating.

    Applying primer incorrectly: Incorrect mixing, excessive film build, or inadequate flash times can contribute to paint defects.

    Ignoring product instructions: Different primers, cleaners, plastics, and paint systems have specific requirements. Using the same process for every material can lead to poor results.

    Taking time to prepare each surface properly helps reduce rework and supports a more consistent finish.

    Auto Paint and Refinishing FAQs

    How Much Does Auto Paint and Refinishing Cost?

    The cost depends on the size of the repair, the condition of the existing finish, the parts involved, and the preparation and labor required.

    Refinishing a single panel generally involves less work than repainting several panels or an entire vehicle. Additional bodywork, replacement parts, and color-blending requirements can also affect the estimate.

    A body shop can provide a more accurate estimate after inspecting the vehicle and determining the necessary repairs.

    How Long Does It Take to Prepare a Panel for Painting?

    Preparation can take several hours or longer, depending on the condition of the panel and the extent of the damage.

    A panel requiring minimal preparation may be ready relatively quickly, while one involving body filler, previous paint defects, replacement parts, or extensive sanding can take considerably longer.

    Primer drying and curing requirements also affect the schedule. Proper preparation takes the time necessary to achieve a suitable surface for refinishing.

    What Are the Most Common Paint Preparation Mistakes?

    Common mistakes include failing to clean the surface thoroughly, overlooking damaged or contaminated areas, choosing inappropriate sanding grits, and not following the manufacturer’s mixing and application instructions.

    Rushing flash times or applying excessive primer can also cause problems that become visible after the final paint is applied.

    The best approach is to follow the recommended process for each material and product rather than assuming every repair requires the same preparation.

    Quality Auto Paint and Refinishing Starts With Proper Preparation

    A durable, professional-looking paint finish depends on the work that happens before the paint is applied. Inspecting parts, cleaning surfaces, feathering repair edges, applying primer correctly, and carefully sanding the repair all contribute to the final result.

    Every vehicle presents its own challenges, which is why preparation methods should match the repair and the products being used.

    Proper preparation and attention to detail are important parts of the collision repair process. Whether your vehicle needs paint refinishing after an accident or repairs to damaged body panels, the goal is to restore its appearance with a finish that blends as closely as possible with the surrounding surfaces.
  • Collision Repair: What to Know After an Accident

    Collision Repair: What to Know After an Accident

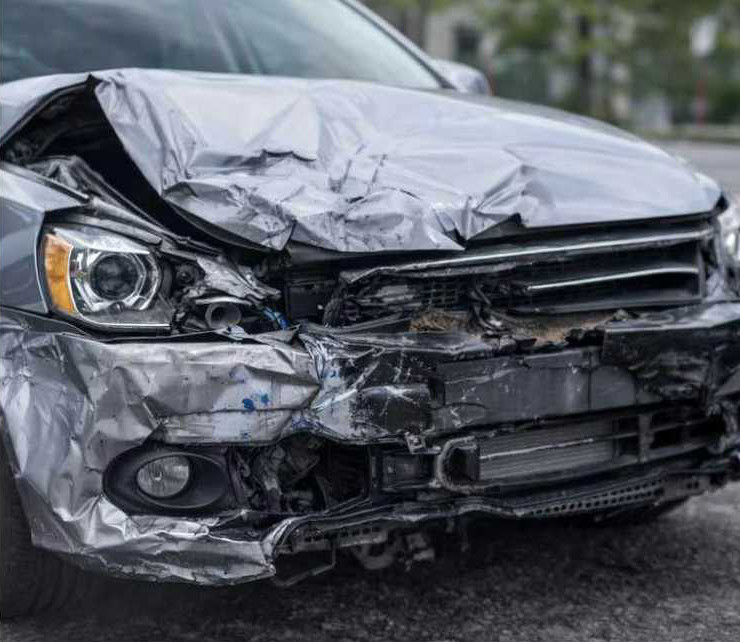
    A car accident can leave you dealing with anything from a scraped bumper to significant body damage. What you see on the outside, however, doesn’t always tell the whole story. Even a minor collision can damage components hidden behind body panels or affect your vehicle’s alignment and safety systems.

    Professional collision repair addresses the damage caused by an accident and helps restore your vehicle’s appearance, function, and structural integrity. Understanding the repair process can help you make informed decisions about your vehicle and know what to expect along the way.

    Key Takeaways

    • Hidden damage matters. A collision can affect structural components, suspension parts, sensors, and other systems that aren’t immediately visible.
    • The right equipment makes a difference. Specialized measuring tools, frame repair equipment, and paint-matching technology help technicians complete repairs according to the vehicle’s requirements.
    • Choose a shop that communicates clearly. Look for a repair team that explains its findings, provides a written estimate, and keeps you informed if additional damage is discovered.

    Why Collision Repair Involves More Than Fixing Dents

    A dented door or damaged bumper may be the most obvious sign of an accident, but the underlying damage can be more extensive.

    Depending on the severity and location of the impact, a collision may affect the vehicle’s frame or unibody structure, suspension, lighting, or electronic safety systems. These components need appropriate attention before the repair can be considered complete.

    For example, if your vehicle starts pulling to one side after an accident, the cause could involve wheel alignment, suspension damage, or another problem that needs investigation. Simply repairing the damaged body panel wouldn’t resolve the underlying issue.

    A thorough damage assessment helps identify the repairs needed to address both visible damage and problems that could otherwise go unnoticed.

    Structural Damage and Vehicle Safety

    Your vehicle’s structure is designed to help manage the forces involved in a collision. When structural components are damaged, they may not perform as intended in another accident.

    Modern vehicles also rely on sensors, cameras, and other electronic systems to support features such as automatic emergency braking and lane departure warnings. Depending on the collision, these systems may need inspection, testing, or calibration.

    Professional collision repair takes these factors into account rather than focusing solely on the vehicle’s appearance.

    Common Collision Repair Services

    The repairs your vehicle needs depend on the type of accident and the extent of the damage.

    Common collision repair services include:

    • Dent and body panel repair: Repairing or replacing damaged doors, fenders, hoods, and other panels.
    • Bumper repair and replacement: Addressing damaged bumper covers and related components.
    • Structural repair: Correcting eligible frame or unibody damage according to the vehicle manufacturer’s repair procedures.
    • Paint refinishing: Preparing and repainting repaired areas to achieve a consistent finish.
    • Parts replacement: Replacing components that cannot be properly repaired.
    • Damage inspection: Checking for hidden damage that may require additional work.

    Before repairs begin, ask the shop to explain what was damaged, which repairs are recommended, and whether any safety-related components need further inspection.

    How Repair Equipment and Technology Make a Difference

    Today’s vehicles often require specialized tools and repair procedures. The equipment used during the repair process helps technicians assess damage, restore alignment, and achieve a professional finish.

    Frame Measuring and Straightening Equipment

    When a collision affects the vehicle’s frame or unibody structure, technicians need to determine how far the damaged areas have shifted from their specified positions.

    Specialized measuring systems help identify these changes. When structural straightening is appropriate, dedicated equipment allows technicians to make controlled corrections and recheck measurements throughout the process.

    Not every damaged component can be straightened. Some parts must be replaced, depending on the type of damage and the manufacturer’s repair guidelines.

    The goal is to restore the structure to the required specifications, not simply make it look straight.

    Computerized Paint Matching

    Matching a repaired panel to the surrounding paint can be challenging. Even small differences in color or finish may become noticeable under direct sunlight or different lighting conditions.

    Computerized paint-matching tools help technicians identify a suitable color formula for your vehicle. The painter then prepares the surface, applies the finish, and blends the repair as appropriate.

    Proper preparation and application are just as important as choosing the correct color. When completed carefully, the refinished area should blend as closely as possible with the surrounding panels.

    TechnologyWhat It DoesWhat to Ask the Repair Shop
    Frame measuring equipmentIdentifies changes in structural alignmentHow will you verify the structure meets the required specifications?
    Frame straightening equipmentCorrects eligible structural damageWill the damaged components be repaired or replaced?
    Computerized paint matchingHelps identify the appropriate paint colorHow will you check the color match and finish?
    Diagnostic equipmentHelps identify problems with electronic vehicle systemsWill affected safety systems need testing or calibration?

    How to Choose an Auto Body Repair Shop

    Choosing a collision repair shop is about more than finding someone who can remove a dent. You want a team that understands the damage, explains the repair process, and keeps you informed while your vehicle is being repaired.

    Before making a decision, consider the following.

    Ask How the Damage Will Be Assessed

    A reliable repair process begins with a thorough inspection. Ask how the shop checks for hidden damage and what happens if additional problems are discovered after damaged panels are removed.

    This is particularly important after harder impacts, when the visible damage may not reflect the full extent of the repairs needed.

    Request a Written Estimate

    A written estimate helps you understand the anticipated cost and scope of the work. It should identify the proposed repairs, parts, and labor as applicable.

    Keep in mind that the initial estimate may change if technicians discover additional damage during disassembly. Ask how the shop will communicate those findings and obtain authorization for additional work.

    Look for Clear Communication

    You shouldn’t have to guess what’s happening with your vehicle.

    Ask how the shop provides progress updates, who you should contact with questions, and how changes to the repair plan will be handled.

    A shop that takes time to explain the process can make an already stressful situation easier to manage.

    Confirm the Shop Can Handle Your Vehicle’s Needs

    Collision damage varies considerably. Some repairs involve replacing a bumper or refinishing a door, while others require structural work or attention to electronic safety systems.

    Ask whether the shop has the equipment, training, and repair capabilities needed for your particular vehicle and the damage it sustained.

    Before authorizing repairs, make sure you understand the proposed work, the estimated cost, and how additional damage or expenses will be handled.

    What to Do After a Collision

    After an accident, it’s easy to feel overwhelmed by insurance paperwork and decisions about repairs. Taking a few practical steps can help you get organized.

    Next StepWhat You Should Do
    Document the damageIf it’s safe, photograph dents, broken lights, damaged panels, and other visible problems.
    Contact your insurerAsk about your coverage, deductible, claim requirements, and next steps.
    Request a repair estimateArrange an inspection with a collision repair shop to assess the damage.
    Review the proposed repairsAsk questions about the work, anticipated costs, and repair timeline before authorizing it.

    You can contact a repair shop to discuss your options while working through your insurance claim. Ask your insurer about any applicable requirements, and confirm how the estimate and repair authorization will be handled.

    If additional damage is discovered during repairs, the shop may need to update the estimate and coordinate with your insurer before proceeding.

    Is It Safe to Drive Your Vehicle After an Accident?

    That depends on the damage.

    A minor cosmetic issue may not prevent you from driving, but damage affecting the steering, brakes, tires, lights, or vehicle structure can make driving unsafe. Warning lights or damage to certain safety systems may also require prompt attention.

    If you’re unsure whether your vehicle is safe to operate, have a qualified professional assess it. Arrange a tow if the damage could make driving dangerous.

    Collision Repair FAQs

    How Much Does Collision Repair Cost?

    The cost depends on several factors, including the extent of the damage, your vehicle’s make and model, the parts required, and the labor involved.

    A damaged bumper may require relatively straightforward repairs, while a collision that affects structural components or electronic systems can involve more extensive work.

    A repair shop can provide an estimate after inspecting your vehicle. If additional damage is found during disassembly, the cost may change. Ask how those changes will be explained and approved.

    How Long Does Collision Repair Take?

    Repair times vary depending on the damage, parts availability, shop workload, and procedures required.

    A minor body repair may take considerably less time than a repair involving structural straightening, replacement parts, paint refinishing, or electronic system calibration.

    Ask the shop for an estimated completion date and how it will keep you informed if the schedule changes.

    Can I Drive My Car If It Has Collision Damage?

    Possibly, but only if the vehicle remains safe and roadworthy.

    Damage to the steering, brakes, tires, lights, or structural components can make driving dangerous. If you notice handling problems, leaking fluids, warning lights, or other concerning symptoms after an accident, don’t assume the vehicle is safe just because it starts and moves.

    When in doubt, arrange an inspection before driving.

    Will My Insurance Cover Collision Repairs?

    Coverage depends on your policy, the circumstances of the accident, and the terms of your claim.

    Contact your insurance company to understand your coverage, deductible, and any applicable repair requirements. You can also ask the body shop how it handles estimates and communicates with insurance companies.

    Before authorizing work, make sure you understand your financial responsibilities and how the claim will be handled.

    Get Your Vehicle Back in Shape With Professional Collision Repair

    An accident can disrupt your routine, damage your vehicle, and leave you with questions about what needs to happen next. Having a clear repair plan and a shop that communicates well can make the process easier.

    At our body shop, the goal is to help you understand your vehicle’s damage and the repairs needed to address it. From body panel damage and paint refinishing to more extensive collision repairs, the right approach starts with a proper assessment.

    If your vehicle has been involved in an accident, contact our body shop to discuss your repair needs and request an estimate.

    Getting the damage assessed is the first step toward restoring your vehicle and getting back on the road.

  • Structural Repair: What Every Driver Should Know After a Collision

    Structural Repair: What Every Driver Should Know After a Collision

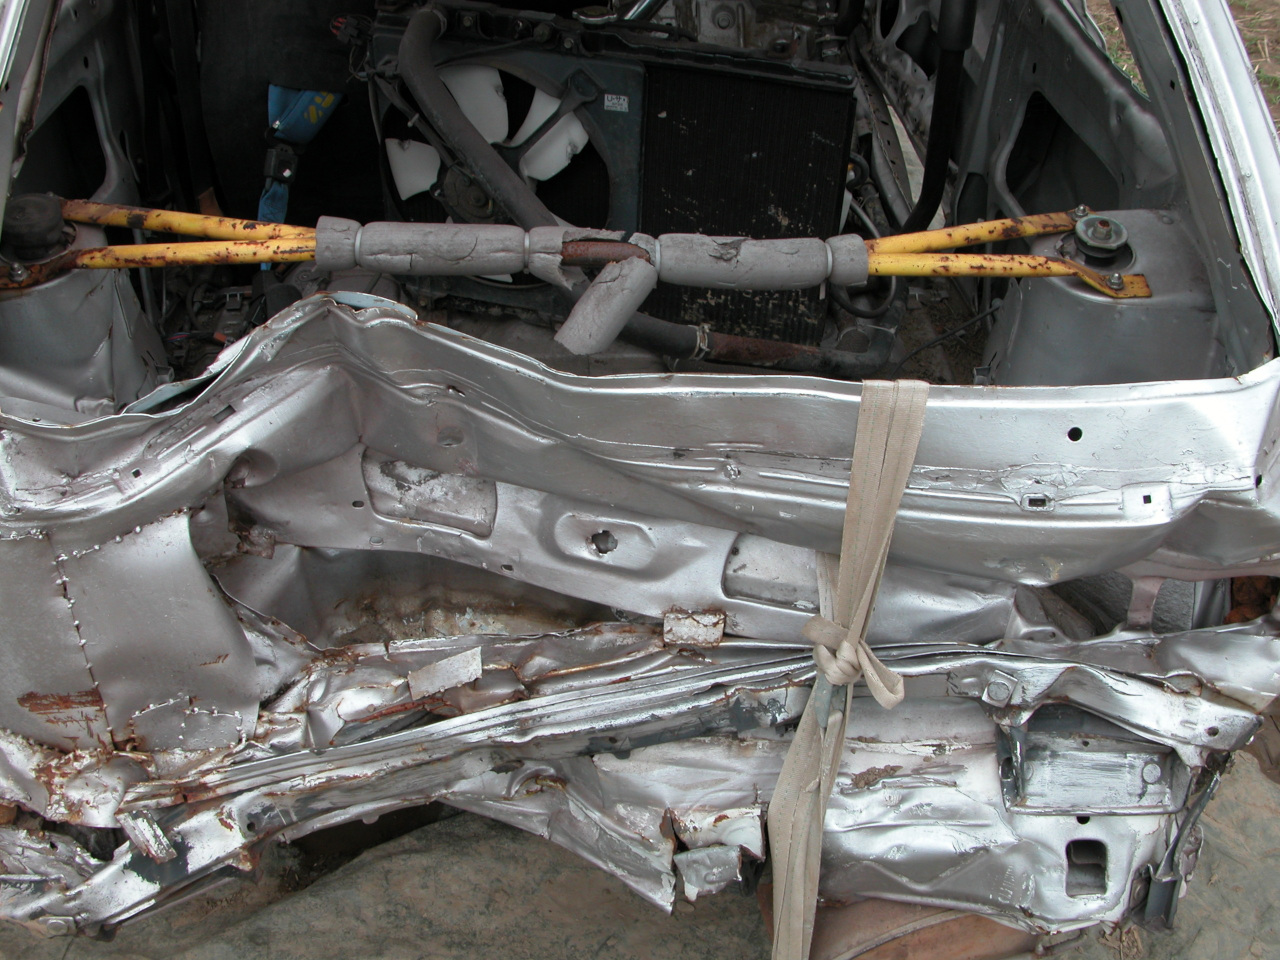
    A collision can cause damage that goes far beyond dents and scratches. Even when your vehicle looks relatively normal, an impact can bend the frame, shift structural components, or affect the alignment of important parts.

    Structural damage can affect your vehicle’s safety, handling, and long-term reliability. Knowing the warning signs and having your vehicle inspected after an accident can help identify problems before they become more serious.

    Key Takeaways

    • Structural damage isn’t always visible. A professional inspection can uncover problems hidden beneath body panels.
    • Proper repairs involve measuring the vehicle’s structure and following manufacturer-approved repair procedures.
    • Warning signs include doors that no longer close properly, uneven body panel gaps, steering changes, and unusual tire wear.
    • If you suspect serious structural damage, avoid driving the vehicle until a qualified professional determines whether it’s safe.

    Why Structural Damage Is More Than a Cosmetic Problem

    Your vehicle’s structure is designed to help manage the forces generated during a collision. When the frame or unibody structure is damaged, it can affect how the vehicle performs and how well its safety features work as intended.

    For example, a damaged section behind a bumper may not be visible from the outside, but it could affect nearby mounting points or other structural components. A collision can also damage suspension components or affect wheel alignment, creating handling problems that aren’t immediately obvious.

    Here’s a look at some common concerns:

    Type of DamagePossible SignsWhy It Matters
    Frame or structural damageUneven panel gaps or visible bendsMay affect structural integrity and crash protection
    Alignment problemsVehicle pulls to one side or steering wheel sits crookedCan affect handling and tire wear
    Hidden collision damageLittle visible damage despite a significant impactProblems may remain undetected without an inspection

    A vehicle that looks fine on the outside may still need structural repairs. That’s why it’s worth having the damage assessed after a collision, even if the visible damage seems minor.

    How Structural Damage Can Affect Vehicle Safety

    Modern vehicles are engineered with specific structural dimensions and designated areas designed to manage collision forces. Damage to these areas can compromise their intended performance in a future accident.

    Structural damage may also affect the mounting or operation of safety-related components. Depending on the collision, the vehicle may need additional inspections, repairs, or safety system checks.

    Simply straightening a visible panel or covering damage with fresh paint won’t address an underlying structural problem.

    Professional structural repair involves identifying the damaged areas and determining the appropriate repair or replacement procedures for your vehicle.

    Warning Signs Your Vehicle May Need Structural Repair

    After an accident, pay attention to changes in how your vehicle looks, closes, and drives. Some signs are easy to spot, while others may become apparent only after you start using the vehicle.

    Changes in Body Panel Alignment

    Check whether the doors, hood, and trunk line up as they did before the collision. Uneven gaps, panels that appear out of position, or doors that suddenly become difficult to close may indicate damage beneath the exterior.

    Steering or Handling Problems

    If your vehicle begins pulling to one side, the steering wheel sits off-center, or you notice unusual shaking after an accident, have it inspected. These symptoms can result from alignment or suspension problems and may warrant a closer look at the vehicle’s structure.

    Unusual Tire Wear

    Tires that wear unevenly may indicate an alignment issue or damage to suspension components. If the problem develops after a collision, a professional inspection can help identify the cause.

    Visible Bends or Creases

    Look for unusual creases or buckling around the vehicle’s body, roof, door openings, and other areas affected by the impact. These signs may indicate damage that extends beyond the outer body panels.

    None of these symptoms proves that your vehicle has structural damage, but any new problem following a collision deserves attention.

    Warning SignWhat to CheckPossible Concern
    Doors or trunk won’t close normallyLatching problems or uneven gapsMisaligned body openings
    Visible creases or bucklingDamaged body or structural areasImpact-related deformation
    Steering changesPulling, shaking, or an off-center steering wheelAlignment, suspension, or structural damage
    Uneven tire wearOne tire wearing faster than othersAlignment or suspension problems

    What Happens During Structural Repair?

    Professional structural repair involves more than making a vehicle look straight again. Technicians must determine how the collision affected the vehicle and follow the appropriate procedures to address the damage.

    1. Inspecting and Measuring the Vehicle

    The process begins with an assessment of the collision damage. Technicians may use specialized measuring equipment to compare key structural points against the vehicle manufacturer’s specifications.

    These measurements can reveal damage that isn’t apparent from the outside. In some cases, body panels or other components must be removed to access damaged areas and obtain accurate measurements.

    2. Repairing the Damaged Structure

    Once the extent of the damage is understood, technicians determine whether affected components can be repaired or need replacement.

    When straightening is appropriate, specialized equipment applies controlled force to bring the structure back within the manufacturer’s specified dimensions. Damaged components that cannot be safely repaired may need to be replaced instead.

    The correct approach depends on the vehicle’s design, the location of the damage, and the manufacturer’s repair procedures.

    3. Checking the Completed Repairs

    After the structural work is completed, technicians can take additional measurements to verify that the repaired areas meet the applicable specifications.

    Related components may also need inspection to identify damage caused by the collision. Depending on the repairs, additional alignment work or safety system checks may be necessary.

    The goal is to address the underlying damage rather than simply improve the vehicle’s appearance.

    Why You Shouldn’t Ignore Structural Damage

    Putting off an inspection can leave important problems undetected. If collision damage affects your vehicle’s alignment or suspension, continued driving may contribute to additional wear or make handling problems worse.

    For example, a vehicle with a damaged suspension component may develop uneven tire wear. Without identifying the underlying cause, replacing the tires alone won’t resolve the problem.

    If you notice new steering issues, unusual noises, visible structural damage, or doors that no longer fit properly after an accident, arrange an inspection promptly.

    If you suspect serious structural damage, don’t continue driving simply because the vehicle still runs. Have a qualified professional determine whether it is safe to operate. If its safety is uncertain, arrange a tow.

    Structural Repair FAQs

    Can You Drive a Vehicle With Structural Damage?

    It depends on the type and severity of the damage, but driving a vehicle with suspected structural damage can be unsafe.

    Damage may affect handling, suspension components, or the vehicle’s ability to provide its intended crash protection. If you notice significant changes after a collision, have the vehicle assessed before driving it again. Arrange a tow if it may be unsafe to operate.

    What’s the Difference Between Structural and Cosmetic Damage?

    Cosmetic damage affects a vehicle’s appearance, such as scratches, paint chips, or minor dents.

    Structural damage affects the frame, unibody structure, or other components that contribute to the vehicle’s strength and alignment. Some damage can involve both categories, which is why a professional inspection is important after a collision.

    Can a Vehicle Have Structural Damage Without Visible Signs?

    Yes. Damage can occur behind bumpers, beneath body panels, or in other areas that aren’t readily visible.

    A vehicle may look relatively normal even when important components have shifted or become damaged. Specialized inspections and measurements can help identify these problems.

    How Do I Prepare for a Structural Damage Inspection?

    A few simple steps can help the repair shop understand what happened:

    • Take photos of the vehicle and visible damage after the collision, if it is safe to do so.
    • Note any changes in steering, handling, or unusual noises.
    • Point out doors, panels, or other components that no longer fit or operate normally.
    • Bring relevant insurance claim information if you are filing a claim.

    This information can help the technician assess the damage and determine what needs further investigation.

    Get Professional Structural Repair at Your Body Shop

    After an accident, it’s not always easy to know whether your vehicle needs cosmetic repairs or more extensive structural work. A professional inspection can help you understand the damage and make an informed decision about the next steps.

    At your body shop, you can get expert structural repairs and precision frame straightening to address collision-related damage. The team can assess your vehicle, explain the recommended repairs, and help you understand your options before work begins.

    Here’s how the shop can help:

    Your NeedsHow Your Body Shop Can Help
    Frame misalignmentPrecision frame straightening
    Collision-related structural damageProfessional structural repair
    Understanding the damageFree inspection
    Planning repair costsFree estimate
    Insurance claim coordinationWorks with all insurance companies

    What to Expect When You Contact the Shop

    The first step is to arrange an inspection so the damage can be evaluated. Once the vehicle has been assessed, the shop can explain the recommended repairs and provide an estimate.

    If you’re working with an insurance company, your body shop can work with your insurer as part of the repair process. Coverage, approvals, and payment responsibilities depend on your policy and claim.

    Having a clear understanding of the damage and proposed repairs helps you make an informed decision about getting your vehicle back on the road.

    Schedule Your Free Structural Repair Inspection

    Structural damage isn’t always obvious, but addressing it properly matters for your vehicle’s safety, handling, and long-term condition.

    If your vehicle has been in an accident, don’t rely on its appearance alone to determine whether it’s safe. Let the body shop assess the damage and explain what repairs may be needed.