
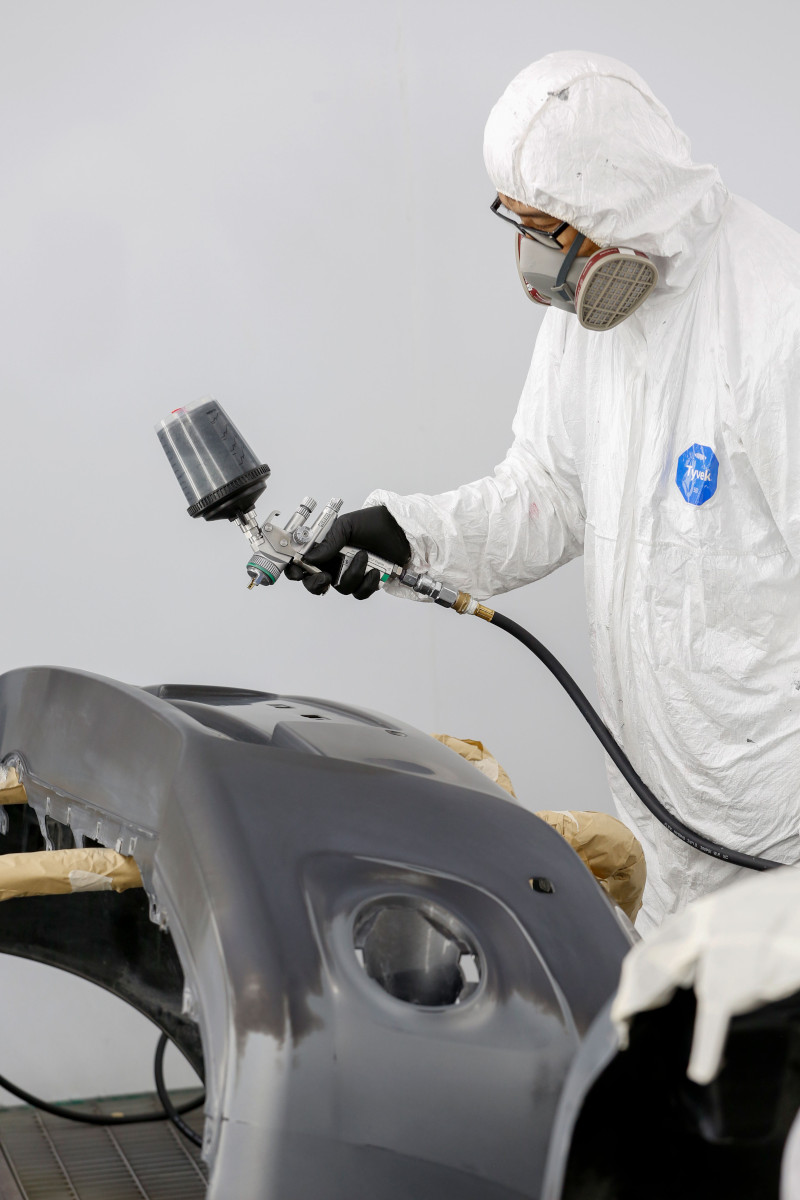
A quality automotive paint job starts long before the paint reaches the spray gun. Proper preparation, the right materials, and attention to detail all play a part in producing a smooth, durable finish.
Every collision repair presents different challenges. A replacement bumper may need different preparation than a previously repaired steel panel, and each surface requires the appropriate products and techniques. Skipping steps or rushing the process can lead to paint defects, poor adhesion, and costly rework.
Understanding the steps involved in auto paint and refinishing helps explain why preparation is just as important as the final coat of paint.
Key Takeaways
- Inspect the repair order and replacement parts first. Knowing which panels need repair, replacement, or blending helps prevent delays and missed steps.
- Clean surfaces before sanding. Dirt, grease, road residue, and mold release agents can interfere with paint adhesion and affect the finished result.
- Follow the correct preparation and priming procedures. Feathered edges, properly applied primer, and careful sanding create a smooth foundation for the new finish.
- Follow the paint manufacturer’s instructions. Recommended sanding grits, mixing ratios, application methods, and flash times vary by product.
Start With the Repair Order and Replacement Parts
Before beginning paint preparation, review the repair order (RO) and confirm which parts need attention. Some panels may require body repairs, others may need replacement, and adjacent panels may need blending to achieve a consistent color match.
Understanding the full scope of the work helps you plan the preparation process and identify potential problems before the vehicle enters the paint area.
Review the Repair Order
The repair order outlines the work required and provides a starting point for planning the paint process.
Check which panels are being repaired or replaced and identify any areas that require refinishing or blending. For example, a replacement door may also require blending into an adjacent fender to help match the existing finish.
Reviewing these details early helps ensure that the necessary work is accounted for before preparation begins.
Inspect Replacement Parts Before Painting
Replacement parts should be checked before they enter the preparation process. Confirm that each part matches the repair order, then inspect it for damage, defects, or potential fitment issues.
A replacement bumper cover, for instance, should be available and inspected before the vehicle reaches the paint stage. Discovering a missing or damaged part at that point can delay the entire repair.
A few simple habits can help keep the job organized:
- Keep the repair order accessible throughout the job.
- Separate replacement parts from panels being repaired.
- Check delivered parts against the repair order.
- Address missing parts or discrepancies before moving forward.
Proper Cleaning Is the Foundation of a Quality Paint Job
Paint preparation begins with a clean surface. Dirt, oil, road tar, and other contaminants can interfere with sanding, paint adhesion, and the final finish.
Clean parts before sanding, whether they are new or used, plastic or metal, and whether they are on or off the vehicle. Cleaning also makes it easier to identify existing damage and surface defects.
The appropriate cleaning method depends on the material and the products being used.
Cleaning Blend Panels and Replacement Parts
Blend panels and previously painted parts can accumulate road grime, bugs, tar, and other contaminants. These should be removed before sanding or applying additional products.
A typical preparation process may include:
- Wash away surface grime. Use an appropriate cleaning method to remove dirt and organic residue, then dry the panel thoroughly.
- Remove petroleum-based contaminants. Use a compatible solvent-based cleaner where appropriate, following the product instructions.
- Clean the surface again. Apply a suitable water-based cleaner to remove remaining residue and contaminants.
- Use clean wiping materials. Follow the cleaner manufacturer’s recommended wiping method to avoid spreading contaminants back across the surface.
New sheet metal, used replacement parts, and sealed plastic components may require different cleaning sequences. Always confirm that the cleaners are compatible with the surface and the refinishing system.
| Surface | Preparation Considerations | Goal |
|---|---|---|
| Previously painted blend panel | Remove dirt, road tar, and other contaminants before sanding | Provide a clean surface for blending |
| Used replacement part | Clean thoroughly and inspect for existing damage or residue | Identify defects and prepare for refinishing |
| New sheet metal | Use compatible cleaners according to product instructions | Remove manufacturing residue and contaminants |
| Sealed plastic | Follow the recommended cleaning and preparation process | Support proper coating adhesion |
Preparing Raw Plastic and Repaired Filler
Raw plastic parts can present additional challenges because manufacturing residues, including mold release agents, may interfere with coating adhesion.
The preparation method depends on the type of plastic and the refinishing products being used. Some systems require a plastic adhesion promoter, while others specify different procedures. Follow the paint manufacturer’s technical data sheets rather than assuming the same process applies to every plastic component.
Body filler also needs careful preparation. Remove sanding dust and use compatible cleaning products before applying primer. Avoid leaving moisture or cleaner residue on the surface, and follow the product instructions for drying and preparation.
Proper cleaning is one of the most effective ways to reduce preventable paint defects. A surface that looks clean may still contain contaminants that affect the finished coating.
Featheredge and Prime the Repair Correctly
Once the surface is clean and the bodywork is complete, the next step is to prepare the transition between the repaired area and the existing finish.
Feathering gradually tapers the edge of the old paint so it doesn’t leave a noticeable ridge beneath the new coating. The goal is to create a smooth transition that can be primed and sanded without leaving visible edges in the finished paint.
Feathering the Paint Edge
Use an appropriate abrasive and sanding method to taper the existing paint around the repair. The required featheredge width depends on the repair, the condition of the surrounding finish, and how many previous refinishing layers are present.
For example, a panel that has been refinished several times may need more preparation than one with its original finish.
The key is to create a smooth, stable transition without leaving loose paint edges or unsanded areas.
Follow the paint manufacturer’s recommendations for sanding grits and preparation. Avoid making large jumps between abrasive grits when those jumps could leave scratches that the next step won’t adequately remove.
Applying Primer
Primer helps prepare the repaired area for subsequent refinishing. The appropriate product and application method depend on the substrate, repair materials, and paint system.
When applying primer:
- Follow the manufacturer’s instructions for mixing and application.
- Apply the recommended number of coats and appropriate film thickness.
- Allow the specified flash times between coats.
- Use the recommended air pressure and spray technique.
- Allow the primer to dry or cure as directed before sanding.
Applying excessive material or rushing between coats can contribute to defects, including swelling around sanding scratches. Insufficient atomization or incorrect spray technique can also affect the primer’s texture and coverage.
The objective is to create a suitable foundation for sanding and the subsequent paint layers, not simply to cover the repair as quickly as possible.
Block Sanding: Creating a Smooth, Even Surface
Block sanding helps level the primed repair and identify surface imperfections that may become visible after painting.
A panel can feel smooth to the touch but still have subtle waves or uneven areas. These imperfections often become more noticeable when light reflects across the finished surface.
Using Guidecoat and the Right Sanding Block
After the primer has dried or cured as directed, a guidecoat can help reveal high and low spots during sanding.
As you sand, the guidecoat gradually disappears from raised areas while remaining in low spots. This makes it easier to see where additional leveling may be necessary.
A suitable sanding block helps distribute pressure across the surface instead of following every small contour. Longer blocks are often useful for leveling larger, flatter areas, while smaller blocks may be better suited to tighter or more curved sections.
A cross-hatch sanding pattern can help produce a more even result. Continue checking the surface as you work, and avoid concentrating too much sanding pressure in one spot.
Choosing the Appropriate Sanding Grit
The correct abrasive depends on the repair stage, the primer being used, and the manufacturer’s requirements for the refinishing system.
Coarser abrasives remove material more quickly but can leave deeper scratches. Finer abrasives produce a smoother surface but may not be suitable for correcting significant high and low spots.
The goal is to use an abrasive that accomplishes the task without creating unnecessary surface damage.
| Repair Need | Preparation Approach | What to Consider |
|---|---|---|
| Leveling high and low spots | 220 to 240 grit on a long board | Choose a grit suitable for the primer and repair |
| Refining an already level surface | 180 grit | Avoid unnecessary material removal |
| Blending filler into existing paint | Create a gradual, smooth transition | Account for the thickness and condition of previous coatings |
| Preparing for the next coating | Follow the paint system’s sanding recommendations | Avoid leaving scratches that may show through the finish |
There isn’t one sanding grit or technique that works for every repair. The correct approach depends on the surface, the products being used, and the condition of the underlying bodywork.
Common Auto Paint Preparation Mistakes
Even experienced technicians can run into problems when preparation steps are rushed or overlooked. Several common mistakes can affect the quality and durability of the finished paint.
Skipping the initial cleaning: Sanding a contaminated surface can spread dirt and residue or interfere with later coatings.
Overlooking replacement part defects: Failing to inspect a part before preparation can lead to delays when damage or fitment problems are discovered later.
Using the wrong sanding grit: An abrasive that’s too coarse can leave scratches that become visible after painting, while an abrasive that’s too fine may not provide the preparation required for the next coating.
Applying primer incorrectly: Incorrect mixing, excessive film build, or inadequate flash times can contribute to paint defects.
Ignoring product instructions: Different primers, cleaners, plastics, and paint systems have specific requirements. Using the same process for every material can lead to poor results.
Taking time to prepare each surface properly helps reduce rework and supports a more consistent finish.
Auto Paint and Refinishing FAQs
How Much Does Auto Paint and Refinishing Cost?
The cost depends on the size of the repair, the condition of the existing finish, the parts involved, and the preparation and labor required.
Refinishing a single panel generally involves less work than repainting several panels or an entire vehicle. Additional bodywork, replacement parts, and color-blending requirements can also affect the estimate.
A body shop can provide a more accurate estimate after inspecting the vehicle and determining the necessary repairs.
How Long Does It Take to Prepare a Panel for Painting?
Preparation can take several hours or longer, depending on the condition of the panel and the extent of the damage.
A panel requiring minimal preparation may be ready relatively quickly, while one involving body filler, previous paint defects, replacement parts, or extensive sanding can take considerably longer.
Primer drying and curing requirements also affect the schedule. Proper preparation takes the time necessary to achieve a suitable surface for refinishing.
What Are the Most Common Paint Preparation Mistakes?
Common mistakes include failing to clean the surface thoroughly, overlooking damaged or contaminated areas, choosing inappropriate sanding grits, and not following the manufacturer’s mixing and application instructions.
Rushing flash times or applying excessive primer can also cause problems that become visible after the final paint is applied.
The best approach is to follow the recommended process for each material and product rather than assuming every repair requires the same preparation.
Quality Auto Paint and Refinishing Starts With Proper Preparation
A durable, professional-looking paint finish depends on the work that happens before the paint is applied. Inspecting parts, cleaning surfaces, feathering repair edges, applying primer correctly, and carefully sanding the repair all contribute to the final result.
Every vehicle presents its own challenges, which is why preparation methods should match the repair and the products being used.
Proper preparation and attention to detail are important parts of the collision repair process. Whether your vehicle needs paint refinishing after an accident or repairs to damaged body panels, the goal is to restore its appearance with a finish that blends as closely as possible with the surrounding surfaces.